
Installing a mailbox post with concrete is one of the most effective ways to ensure your mailbox stays sturdy and secure for years to come. Whether you're replacing an old post or setting up a new one, doing it correctly is essential for both curb appeal and postal compliance.
This guide walks you through the tools you'll need, preparation steps, and the entire process of installing a mailbox post with concrete, even if you’ve never done it before.
Why Use Concrete for Your Mailbox Post?
Setting your mailbox post in concrete gives it superior strength and stability, particularly in areas with heavy winds, snow, or shifting soil. A post that’s simply buried in dirt can tilt or collapse over time. With concrete, the post remains solid, upright, and aligned — essential for both aesthetics and USPS delivery standards.
What You’ll Need
Before starting the project, gather the necessary materials and tools:
-
Mailbox post (preferably pressure-treated wood or metal)
-
Mailbox (compatible with your post)
-
Concrete mix (fast-setting works well)
-
Gravel
-
Level
-
Post hole digger or shovel
-
Tape measure
-
Screwdriver or drill
-
Bucket or wheelbarrow (for mixing concrete)
-
Protective gloves and safety glasses
Step 1: Check USPS Regulations and Local Guidelines
The United States Postal Service has specific requirements for mailbox height and placement. Generally, the bottom of the mailbox should be 41–45 inches above the ground, and the front of the box should be set 6–8 inches back from the curb or edge of the road. Always verify these standards with your local post office and check for any HOA or municipal restrictions.
Step 2: Choose the Right Location
Select a spot that:
-
Is easily accessible to mail carriers
-
Is visible and safe for both pedestrians and vehicles
-
Has solid ground with minimal obstructions
Make sure you won’t be digging near underground utilities. Call 811 (in the US) to locate any buried lines before you start.
Step 3: Dig the Post Hole
Use a post hole digger or shovel to dig a hole that is at least 24 inches deep and 6–8 inches in diameter. The depth is important to withstand frost heave in colder climates and to ensure the post is stable once installed.
For best results, dig an extra 6 inches to add a gravel base at the bottom of the hole. This helps with drainage and prevents water from pooling around the post.
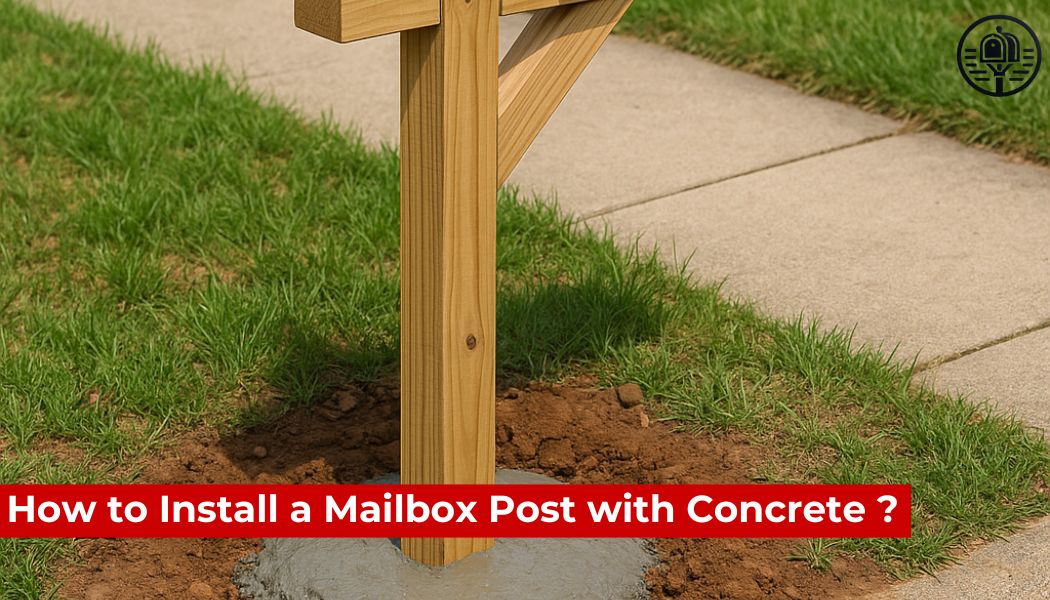
Step 4: Add Gravel and Set the Post
Pour 4–6 inches of gravel into the bottom of the hole and tamp it down. Place your mailbox post into the center of the hole. Use a level to ensure the post is straight vertically. This is critical—once the concrete sets, adjustments will be difficult.
Have someone hold the post in place, or use temporary braces if you're working alone.
Step 5: Mix and Pour the Concrete
Prepare the concrete mix according to the manufacturer's instructions. If you're using fast-setting concrete, you may be able to pour the dry mix directly into the hole and add water on top.
Fill the hole with concrete up to about 2 inches below ground level. This space allows you to cover the top of the concrete with soil or grass later for a clean look.
Check the post again with your level and make any final adjustments before the concrete begins to set.
Step 6: Allow the Concrete to Set
Let the concrete cure for at least 4–6 hours before applying any pressure or installing the mailbox. For best results, wait 24 hours before mounting the box or using the post.
During this time, ensure the post remains upright and undisturbed. If necessary, recheck with your level periodically during the first hour.
Step 7: Attach the Mailbox
Once the concrete has cured and the post is secure, follow the manufacturer’s instructions to attach the mailbox. Most boxes attach using screws or brackets. Make sure the mailbox door opens freely and that the unit is aligned correctly with the road.
Step 8: Clean Up and Finishing Touches
Cover the concrete base with soil, grass, or mulch to blend with the landscape. If your post is wood, consider painting or staining it for added weather resistance. Metal posts may benefit from a rust-proof coating.
Adding house numbers or a decorative topper can improve visibility and curb appeal.
Maintenance Tips
-
Inspect your mailbox post regularly for signs of rot, rust, or instability.
-
Repaint or reseal wood posts annually if exposed to harsh elements.
-
Make sure snow or debris doesn’t block access to the mailbox.
Final Thoughts
By following these steps, you can ensure your mailbox post installed with concrete is durable, secure, and professionally done. It’s a small project that pays off with long-term reliability and peace of mind.
Frequently Asked Questions
How deep should I dig the hole for my mailbox post?
A depth of 24 inches is typically recommended, plus 4–6 inches for a gravel base.
Can I use fast-setting concrete?
Yes, fast-setting concrete is convenient and works well for this application. Just follow the package instructions carefully.
How long does concrete take to cure before I can install the mailbox?
You should wait 4–6 hours for initial curing, but 24 hours is ideal for full strength.
Do I need a permit to install a mailbox post?
Usually not, but some HOAs or cities may have specific regulations. Always check with local authorities.
What type of mailbox post is best?
Pressure-treated wood or galvanized steel posts are commonly used because they are durable and weather-resistant.