
Building your own mailbox is a rewarding project that allows you to combine functionality, creativity, and curb appeal in one simple DIY task. Whether you're looking to match your home’s exterior, save money, or enjoy a weekend project, learning how to make a mailbox is a great place to start.
In this article, we’ll walk you through everything you need to know: from planning and materials to construction and installation. The goal is to create a durable, weather-resistant, and visually appealing mailbox that complies with postal regulations and suits your home’s style.
Why Build a Mailbox Yourself?
While there are plenty of premade models available on the market, creating your own mailbox has several advantages:
-
Customization: Choose the size, color, and design that match your home.
-
Cost-Effective: Build with materials you already have or purchase affordably.
-
Satisfaction: Enjoy the pride of crafting something useful with your own hands.
-
Durability: Control the quality of materials and construction.
Before you get started, we recommend reviewing design ideas and practical tips on our mailbox blog to help inspire your build.
Tools and Materials Needed
To make a simple, traditional post-mounted mailbox, you’ll need the following tools and supplies:
Tools:
-
Saw (hand or electric)
-
Power drill and bits
-
Measuring tape
-
Screwdriver
-
Sandpaper
-
Paintbrush or roller
Materials:
-
Exterior-grade wood or sheet metal
-
Galvanized nails or exterior screws
-
Weather-resistant paint or sealant
-
Hinges and a latch (for the door)
-
Mailbox post (treated lumber or metal post)
-
Optional: numbers, flag kit, decorative elements
Choose weather-resistant materials like cedar, redwood, or pressure-treated wood. If you opt for a metal design, use galvanized steel or aluminum to avoid rust.
Step 1: Design and Plan
Start by deciding on the size and shape of your mailbox. The USPS recommends interior dimensions of about 19" L x 6.5" W x 8.5" H for a standard curbside mailbox.
Sketch a simple design with measurements for:
-
Front door (with latch)
-
Rear access (optional)
-
Arched or flat roof
-
Ventilation or drainage (if needed)
Consider matching the style to your home’s aesthetic — modern, rustic, minimalist, or traditional.
Step 2: Cut and Prepare the Materials
Using your measurements, cut the front, back, sides, bottom, and roof panels. Sand all surfaces to smooth out edges and remove splinters. Pre-drill screw holes to prevent wood from splitting during assembly.
If using metal, wear gloves and use tin snips or a metal shear for safe, precise cuts.
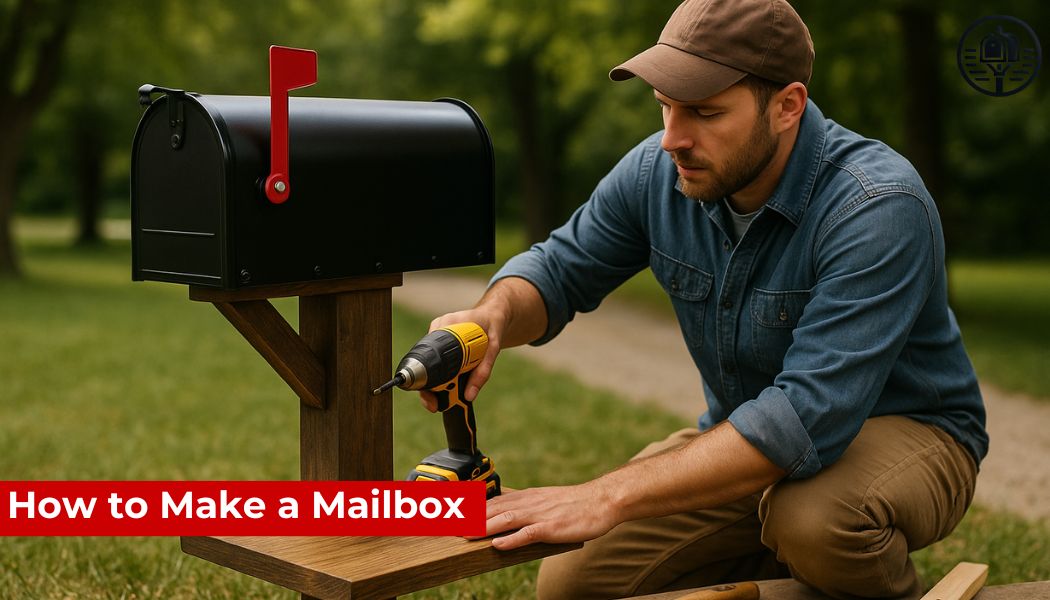
Step 3: Assemble the Mailbox Body
Start by attaching the side panels to the bottom using exterior screws. Then add the back panel, followed by the front door using hinges and a small magnetic catch or latch for secure closure.
Attach the roof panels last, ensuring a slight overhang to protect the interior from rain. You can use a single sloped roof or a peaked design depending on your preference.
Make sure all joints are tight and the structure is square.
Step 4: Paint and Seal
Apply a weather-resistant paint or sealant to protect your mailbox from moisture and UV damage. Use exterior wood paint for wooden boxes, or rust-resistant spray paint for metal.
Let it dry completely before mounting. If desired, you can add house numbers, a flag kit, or decorative trim to personalize your creation.
Step 5: Install the Mailbox on a Post
If you’re installing a post-mounted mailbox, follow these USPS guidelines:
-
Post height: 41" to 45" from the ground to the bottom of the mailbox
-
Mailbox setback: 6" to 8" from the curb or roadside edge
Dig a hole about 24" deep for the post. Place it in the ground and secure it with fast-setting concrete. After the concrete sets, attach the mailbox to the post using brackets or screws, ensuring it’s level and secure.
For installation ideas and post options, browse our mailbox blog where we explore different styles and mounting techniques.
Step 6: Final Touches and Testing
Open and close the door several times to test the hinges and latch. Ensure there's no wobble or movement. Check that mail can be easily inserted and retrieved.
If you've included a flag, verify that it moves smoothly. Add any final decorative details to give your mailbox a polished, finished look.
Congratulations — you’ve successfully built and installed your own mailbox!
Common Customization Ideas
-
Painted designs or stencils
-
Reclaimed wood finishes
-
Built-in planter boxes
-
Lighting (solar or battery-powered)
-
Custom nameplates or house numbers
Let your creativity shine while keeping functionality and durability in mind.
Frequently Asked Questions (FAQ)
Is it legal to make your own mailbox?
Yes, as long as your DIY mailbox meets USPS standards for size, placement, and accessibility. Custom designs are allowed but must function properly and safely.
Can I use any materials for building a mailbox?
It’s recommended to use weather-resistant materials like pressure-treated wood or galvanized metal. Avoid untreated wood or thin plastic, which won’t hold up outdoors.
How long does it take to build a mailbox?
Most homeowners can build a basic mailbox in one day or over a weekend, depending on design complexity and drying time for paint or sealant.
Do I need to install a flag?
If your mailbox is used for outgoing mail, a flag is useful to signal to the postal carrier. You can buy a flag kit or build one from lightweight materials.
Can I mount my mailbox directly to a wall or fence?
Yes. If you prefer a wall-mounted design, simply adapt your dimensions and mounting plan. Just ensure it’s weatherproof and easily accessible for deliveries.