
Installing a mailbox post may seem like a simple weekend project, but doing it the right way ensures long-term stability, safety, and compliance with USPS guidelines. Whether you're replacing an old post or setting up a new mailbox location, learning how to put up a mailbox post properly will save you time, money, and hassle down the line.
In this detailed guide, we’ll walk you through the tools you need, preparation steps, proper measurements, and pro tips for a durable and secure installation.
Why Installing a Mailbox Post Correctly Matters
A securely installed mailbox post isn’t just about aesthetics—it’s essential for:
-
USPS compliance
-
Weather resistance and longevity
-
Safe and efficient mail delivery
-
Curb appeal and property value
A leaning or unstable post can lead to undelivered mail or costly repairs, so it’s worth getting right the first time.
Tools and Materials You'll Need
Before you begin, gather the following items:
-
4x4” pressure-treated wooden post or pre-made mailbox post kit
-
Shovel or post hole digger
-
Level
-
Quick-set concrete mix (optional but recommended)
-
Gravel (for drainage)
-
Tape measure
-
Pencil or marker
-
Mailbox (USPS-approved)
-
Screws and power drill
Having everything ready ahead of time ensures a smooth installation process.
Step 1: Choose the Right Mailbox Post
Make sure the post is:
-
Weather-resistant (treated wood, metal, or composite)
-
Compatible with your mailbox type
-
At least 72 inches long (for burial depth and height compliance)
Avoid untreated wood, which can rot quickly when exposed to moisture and the elements.
Step 2: Review USPS Height and Placement Guidelines
To ensure proper mail delivery, follow these USPS standards:
-
Height: The bottom of the mailbox should be 41–45 inches from the ground.
-
Setback: The front of the mailbox should be 6–8 inches back from the curb or road edge.
Use a tape measure and stake to mark the location accurately before digging.
Step 3: Dig the Post Hole
Use a shovel or post hole digger to create a hole approximately:
-
20–24 inches deep
-
8–10 inches wide
Wider holes allow for better support and concrete anchoring. For cold climates, check local frost line depth and adjust accordingly.
Step 4: Add Gravel for Drainage
Pour 4–6 inches of gravel into the bottom of the hole to improve drainage. This prevents water from accumulating at the base and rotting the post.
Tamp the gravel down firmly to create a solid base.
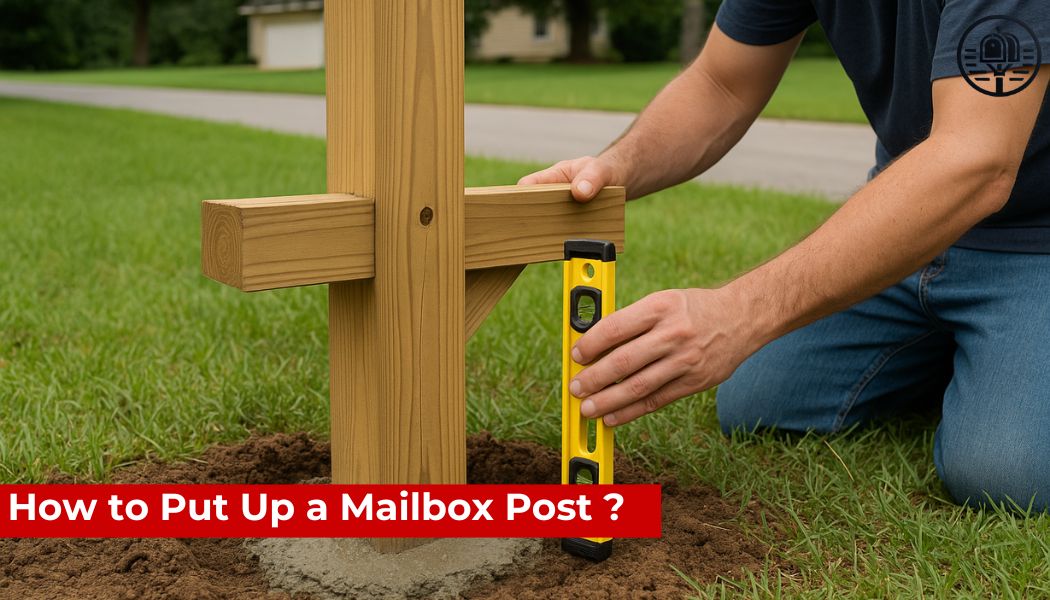
Step 5: Insert and Align the Post
Place the mailbox post into the center of the hole and use a level to ensure it is perfectly vertical from all sides. Use temporary supports (like wood braces or rocks) to hold the post upright during the next step.
Mark the post with a pencil at the desired height of the mailbox before pouring concrete.
Step 6: Secure with Concrete (Optional but Recommended)
Pour quick-set concrete into the hole around the post, stopping about 2–3 inches below ground level. Follow the manufacturer’s instructions for mixing and curing times.
Make sure the post stays level as the concrete sets—typically 20–40 minutes for initial firmness.
In areas with soft soil or frequent storms, concrete provides crucial stability and prevents leaning.
Step 7: Let the Concrete Cure
Wait at least 4–6 hours (ideally 24 hours) before mounting the mailbox, especially if the post will bear weight or face heavy wind.
If you didn’t use concrete, pack soil firmly around the post and water it down to compact it.
Step 8: Attach the Mailbox
Once the post is secure, mount your USPS-approved mailbox using screws or a mounting bracket, depending on your mailbox model.
Make sure the mailbox is:
-
Aligned properly with the road
-
Mounted at the correct height
-
Secure and doesn’t wobble
Check that the mailbox door opens freely and the flag operates as intended.
Step 9: Add Finishing Touches
For extra durability and curb appeal, consider:
-
Painting or staining wooden posts
-
Installing reflective house numbers
-
Adding a solar light on top of the post
-
Applying a waterproof sealant
These upgrades not only make your mailbox post more attractive but also more functional and weather-resistant.
FAQ
Do I need permission to install a mailbox post?
Usually not, but always check with your local municipality or HOA for specific guidelines, especially if placing it near a shared road.
Can I use metal or plastic posts instead of wood?
Yes, as long as they’re durable, weather-resistant, and meet USPS standards. Many modern kits come with composite or aluminum posts.
How deep should a mailbox post be buried?
At least 20–24 inches for most climates. In colder areas, dig below the frost line to prevent movement from freeze-thaw cycles.
Is concrete necessary?
It’s highly recommended for stability, especially in soft soil. However, it’s not required if the soil is firm and compacted well.
What type of mailbox should I use?
Use a USPS-approved mailbox that fits securely on your post. Check size and weight limits if you're in a neighborhood with cluster mail delivery.
Final Thoughts
Learning how to put up a mailbox post is a straightforward but essential project for any homeowner. By following USPS regulations and using the right tools and materials, you can ensure your mailbox is both functional and long-lasting.
Whether you're upgrading your current setup or installing one from scratch, a sturdy, well-positioned mailbox post ensures reliable mail delivery and adds charm to your home’s exterior.