
Installing a mailbox post correctly is essential for ensuring secure mail delivery and compliance with postal regulations. Whether you are replacing an old mailbox post or installing a new one, following the right steps can make a significant difference in durability and stability. In this guide, we will cover the materials you need, the installation process, and the best practices for maintaining a mailbox post. First and foremost, you need to choose a quality mailbox post - that's what our collection of mailbox post is all about!
Choosing the Right Mailbox Post
Before starting installation, selecting the appropriate mailbox post is crucial. Here are some factors to consider:
1. Material
Mailbox posts come in various materials, each with its own advantages:
-
Wood: Traditional and customizable, but requires sealing to prevent rot.
-
Metal (Aluminum or Steel): Durable and resistant to rust, often used for modern designs.
-
Plastic or PVC: Lightweight and weather-resistant, but may not be as sturdy as wood or metal.
2. Height and Size
According to the United States Postal Service (USPS) guidelines, a mailbox post should:
-
Be 41 to 45 inches from the ground to the bottom of the mailbox.
-
Be placed 6 to 8 inches back from the curb to allow easy access for mail carriers.
3. Compliance with Local Regulations
Some neighborhoods and homeowner associations (HOAs) have specific guidelines regarding mailbox designs and placement. Always check local regulations before installation.
Tools and Materials Needed
To install a mailbox post, you will need the following tools and materials:
-
Mailbox post (wood, metal, or PVC)
-
Mailbox (compatible with the post)
-
Post hole digger or shovel
-
Quick-setting concrete (if using a wooden or metal post)
-
Gravel (for drainage)
-
Level
-
Measuring tape
-
Screws or mounting hardware
-
Drill or screwdriver
-
Protective gloves (optional but recommended)
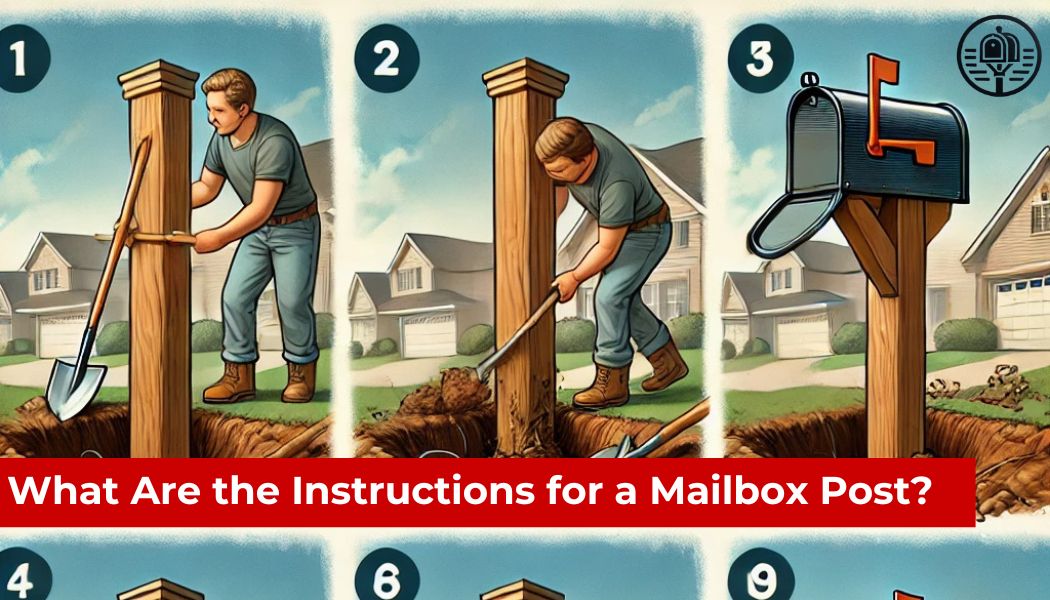
Step-by-Step Instructions for Installing a Mailbox Post
1. Choose the Location
Select a flat and stable location that aligns with USPS placement rules. Ensure the post is positioned 6 to 8 inches from the curb and does not obstruct pedestrian walkways.
2. Dig the Post Hole
Using a post hole digger or shovel, dig a hole that is at least 20-24 inches deep and 8-10 inches wide. This ensures the post is deeply set for stability.
3. Add Gravel for Drainage
Pour 2-4 inches of gravel into the hole to help with drainage and prevent wood rot if using a wooden post.
4. Position the Mailbox Post
Place the post into the hole, ensuring it is standing straight and level. Use a spirit level to check alignment.
5. Secure the Post with Concrete
For added stability, mix quick-setting concrete according to the manufacturer’s instructions and pour it around the post. Allow at least 24 hours for the concrete to set before attaching the mailbox.
6. Attach the Mailbox
Once the post is secure, attach the mailbox using screws or mounting hardware as per the manufacturer’s guidelines. Ensure it is level and aligned correctly.
7. Add Finishing Touches
Consider painting or sealing wooden posts for weather protection. Decorative post covers can also enhance curb appeal.
Maintaining Your Mailbox Post
To ensure longevity, follow these maintenance tips:
-
Inspect for damage regularly, especially after storms or harsh weather.
-
Repaint or seal wooden posts annually to prevent rot and decay.
-
Tighten screws and bolts periodically to maintain structural integrity.
-
Clear obstructions around the mailbox to provide mail carriers with easy access.
Common Mistakes to Avoid
1. Incorrect Height or Placement
Placing the mailbox too high or too low can lead to delivery issues. Always follow USPS height and setback guidelines.
2. Not Using Concrete for Stability
A loose mailbox post can lean over time. Using concrete ensures long-term stability, particularly in areas with heavy rainfall or wind.
3. Ignoring Local Regulations
Failing to check HOA or municipal regulations can result in fines or the need for reinstallation.
4. Using Inadequate Materials
Weak or untreated wood can deteriorate quickly. Choosing weather-resistant materials extends the lifespan of your mailbox post.
FAQ: Frequently Asked Questions
1. Do I need permission to install a mailbox post?
In most cases, you do not need a permit. However, if you live in a community with a homeowners’ association (HOA), check for any guidelines or restrictions.
2. Can I install a mailbox post without concrete?
Yes, but it is not recommended. Concrete provides essential stability, preventing the post from shifting due to weather conditions or accidental impacts.
3. How long does it take to install a mailbox post?
The entire process takes about 1-2 hours, excluding concrete drying time.
4. Can I replace my mailbox without replacing the post?
Yes, as long as the post is still in good condition and meets USPS regulations. Simply unscrew the old mailbox and mount the new one.
5. How do I remove an old mailbox post?
To remove a post, dig around the base, loosen the soil, and pull it out. If concrete was used, you may need to break it apart or dig deeper to extract it.
Final Thoughts
Installing a mailbox post is a straightforward process that enhances both functionality and curb appeal. By following proper installation techniques and USPS regulations, you can ensure your mailbox remains secure and durable for years to come. Whether using wood, metal, or PVC, choosing the right materials and securing the post correctly will help you avoid common issues and maintain a stable mailbox system.