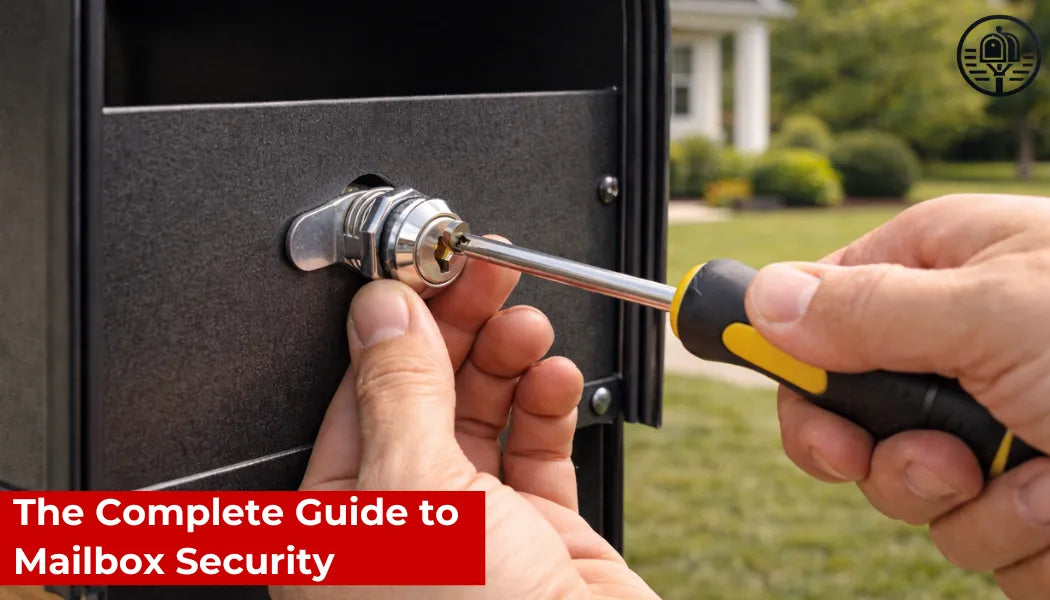
Replacing a mailbox lock takes 10 minutes and costs $8 to $20 for the replacement part. You need one flathead screwdriver. The process is identical for wall-mounted and curbside post-mounted mailboxes — remove the retaining nut inside the door, pull the old cylinder out from the front, insert the new one, and secure it.
Here's the complete process with the measurements you need before buying, the installation steps, and when to call a locksmith instead.
When to Replace vs When to Repair
Replace the lock when : The key is lost and you don't know who has copies. The lock has been tampered with — scratches around the keyway or a bent cam arm. The cylinder is visibly rusted inside the keyway. The key requires multiple attempts to turn. You're moving into a property where the previous occupant had a key.
Repair or maintain instead when : The key sticks occasionally but turns with effort — this is a lubrication issue, not a replacement issue. Apply graphite spray into the keyway and the problem resolves in most cases. See our full guide on how to maintain your mailbox lock for the complete maintenance protocol.
The cost difference matters here : a graphite lubricant costs $6 and lasts years. A replacement lock costs $8-20. If the lock still opens and closes cleanly, maintenance is always the right first step.
⚠️ Cluster box units — read this first If your mailbox is part of a USPS cluster box unit (CBU) in an apartment complex or HOA community, do not attempt to replace the lock yourself. CBU locks are federal postal property — only USPS or your property manager can legally replace them. Contact your local post office branch directly and they will initiate the replacement process.
Step 1 — Measure Before You Buy
This is the step most people skip and regret. Mailbox locks are not universal — buying the wrong size means the barrel won't fit through the door hole or the retaining nut won't tighten flush.
Three measurements you need :
Hole diameter — the diameter of the existing lock hole in your mailbox door. The most common standard for residential mailboxes is 5/8" (16mm). Some mailboxes use 3/4" or 7/8". Measure with a caliper or ruler across the widest point of the hole.
Panel thickness — the thickness of the mailbox door where the lock installs. Standard range is 1/16" to 3/8". A lock barrel that's too short won't thread through — one that's too long won't allow the retaining nut to tighten. Measure the door edge directly.
Cam arm length — the flat metal arm inside the mailbox that rotates to engage the door frame when locked. Remove your existing lock and measure the cam arm length in millimeters, or bring the old lock to compare at the hardware store.
| Measurement | Standard residential | Where to measure |
|---|---|---|
| Hole diameter | 5/8" (16mm) | Across the lock hole |
| Panel thickness | 1/16" to 3/8" | At the door edge |
| Cam arm length | Varies by mailbox | Inside the door frame |
If you can remove the old lock before buying, bring it with you — this eliminates any measurement uncertainty.
🔑 Find the right replacement lock Our mailbox lock collection lists hole diameter and panel thickness specs for each model. Filter by your measurements for an exact fit — no guesswork, no returns. Free shipping on all orders.
Step 2 — Remove the Old Lock
If you still have the key : Open the mailbox door fully. Look inside the door at the back of the lock — you'll see the barrel protruding through the door with a retaining nut threaded onto it, and the cam arm attached below or behind. Use a flathead screwdriver or pliers to unscrew the retaining nut counterclockwise. Once removed, the cam arm slides off the barrel. Pull the cylinder out from the front of the door. Done.
If you've lost the key and the mailbox is closed : This is the situation where most people overcomplicate things. The simplest approach : drill out the lock. Use a metal drill bit slightly smaller than the keyway diameter (typically 3/16" or 1/4") and drill directly into the center of the keyway to a depth of about 3/4". This destroys the pin stack and allows the cylinder to rotate freely. Insert a flathead screwdriver into the keyway and turn — the cam arm disengages and the door opens. Then remove the cylinder as described above.
Drilling takes about 3 minutes and destroys only the lock — not the mailbox door. Wear safety glasses. The drill bit will be hot after use.
If the retaining nut is seized : Apply penetrating oil (WD-40 or equivalent) to the nut and let it dwell for 10-15 minutes before attempting removal. If it still won't turn, use locking pliers for additional grip. In rare cases of severe corrosion, the nut may need to be cut — use a rotary tool with a metal cutting disc.
🛠️ Removing a frozen or corroded lock Penetrating oil on the retaining nut, 15 minutes dwell time, then locking pliers. This handles 95% of stuck nuts. If the barrel itself is frozen in the hole due to corrosion, work penetrating oil around the barrel from inside the door and wait another 15 minutes before pulling. Never hammer the cylinder out — this deforms the door hole and makes installing the new lock impossible.
Step 3 — Install the New Lock
Insert the new cylinder barrel through the lock hole from the front of the mailbox door. The face of the cylinder (where the keyway is) should sit flush against the exterior of the door — not recessed, not protruding more than 1/8".
From inside the door, thread the retaining nut onto the barrel by hand first, then tighten with a screwdriver or pliers. Tighten firmly but don't overtighten — the cylinder should be immobile in the door hole but the door itself shouldn't warp. Attach the cam arm to the barrel according to the new lock's instructions — most cam locks have a slot that the arm slides into, then a set screw that locks it in position.
Test before closing the door : insert the key and rotate to the locked position. The cam arm should rotate smoothly and extend far enough to engage the door frame strike plate. Rotate back to unlock — the arm should return cleanly to the open position. Open and close the door several times testing both positions.
If the cam arm doesn't reach the strike plate : The cam arm is too short. Most replacement locks include multiple cam arm lengths or an adjustable cam — check the packaging. Some mailboxes require an offset cam arm rather than a standard flat cam. If the included cam arm doesn't reach, the lock supplier can provide an alternative.
If the cylinder spins in the hole : The barrel diameter is too small for the hole, or the retaining nut isn't tight enough. Tighten the nut first. If the cylinder still spins, the hole is larger than 5/8" and you need a lock with a larger barrel or a reducing bushing.
Step 4 — Final Checks and Key Management
Test the lock 10 times with each key included before considering the installation complete. A lock that sticks on the 3rd or 4th turn is misaligned — loosen the retaining nut slightly, realign the cylinder, and retighten.
Key management after installation : Store at least one spare key away from the mailbox — with a trusted neighbor, in a key lockbox near the front door, or in a secure drawer inside the house. Note the key code if it's stamped on the key or listed in the packaging — this allows you to order duplicate keys from a locksmith without bringing the physical key.
If the new lock came with more than 2 keys and you have household members who need access, distribute keys before storing spares. More keys distributed now means fewer lockout scenarios later.
Apply a small amount of graphite lubricant into the new keyway immediately after installation — new locks are often manufactured dry and benefit from an initial lubrication before first use.
When to Call a Locksmith
DIY replacement handles the vast majority of residential mailbox lock situations. Call a locksmith when :
The lock is embedded in a custom-built brick or stone mailbox enclosure where you can't access the interior of the door. The mailbox door itself is damaged and needs repair alongside the lock replacement. You're dealing with a high-security pin tumbler lock with a proprietary keyway that requires specialized tooling to remove.
Locksmith cost for mailbox lock replacement : $60-120 including labor and the lock. For a standard cam lock situation this is significantly more expensive than DIY — but for complex installations it's the right call.
FAQ
How do I replace a mailbox lock without the key? Drill out the existing lock using a metal drill bit the same diameter as the keyway (typically 3/16" or 1/4"). Drill to a depth of 3/4" into the center of the keyway — this destroys the pin stack and allows the cylinder to rotate freely with a flathead screwdriver. Open the door, then remove and replace the lock normally.
What size lock do I need to replace my mailbox lock? Measure three things before buying : hole diameter (most residential mailboxes use 5/8"/16mm), panel thickness (1/16" to 3/8" is standard), and cam arm length. If possible, remove the old lock and bring it to compare at the hardware store.
How long does it take to replace a mailbox lock? 10 minutes for a standard cam lock replacement when you have the key. 15-20 minutes if you need to drill out the existing lock first. The process is the same for wall-mounted and curbside post-mounted mailboxes.
How much does it cost to replace a mailbox lock? The replacement lock costs $8-20 at a hardware store or online. DIY installation is free. A locksmith charges $60-120 for the same job including the lock.
Do I need permission to replace my mailbox lock? For a residential curbside or wall-mounted mailbox you own — no permission needed. For USPS cluster box units in apartment complexes or HOA communities — yes, only USPS or your property manager can legally replace the lock.
Can I replace a mailbox lock with a better one? Yes — replacing a standard cam lock with a pin tumbler lock or a keyless combination lock is a direct upgrade in security. Verify the hole diameter and panel thickness are compatible with the new lock model before purchasing.
What if the cam arm doesn't reach the door strike plate after installation? The cam arm is too short for your mailbox door configuration. Most replacement locks include multiple cam arm lengths — try the longer option. If not included, contact the lock supplier for an extended or offset cam arm compatible with your model.